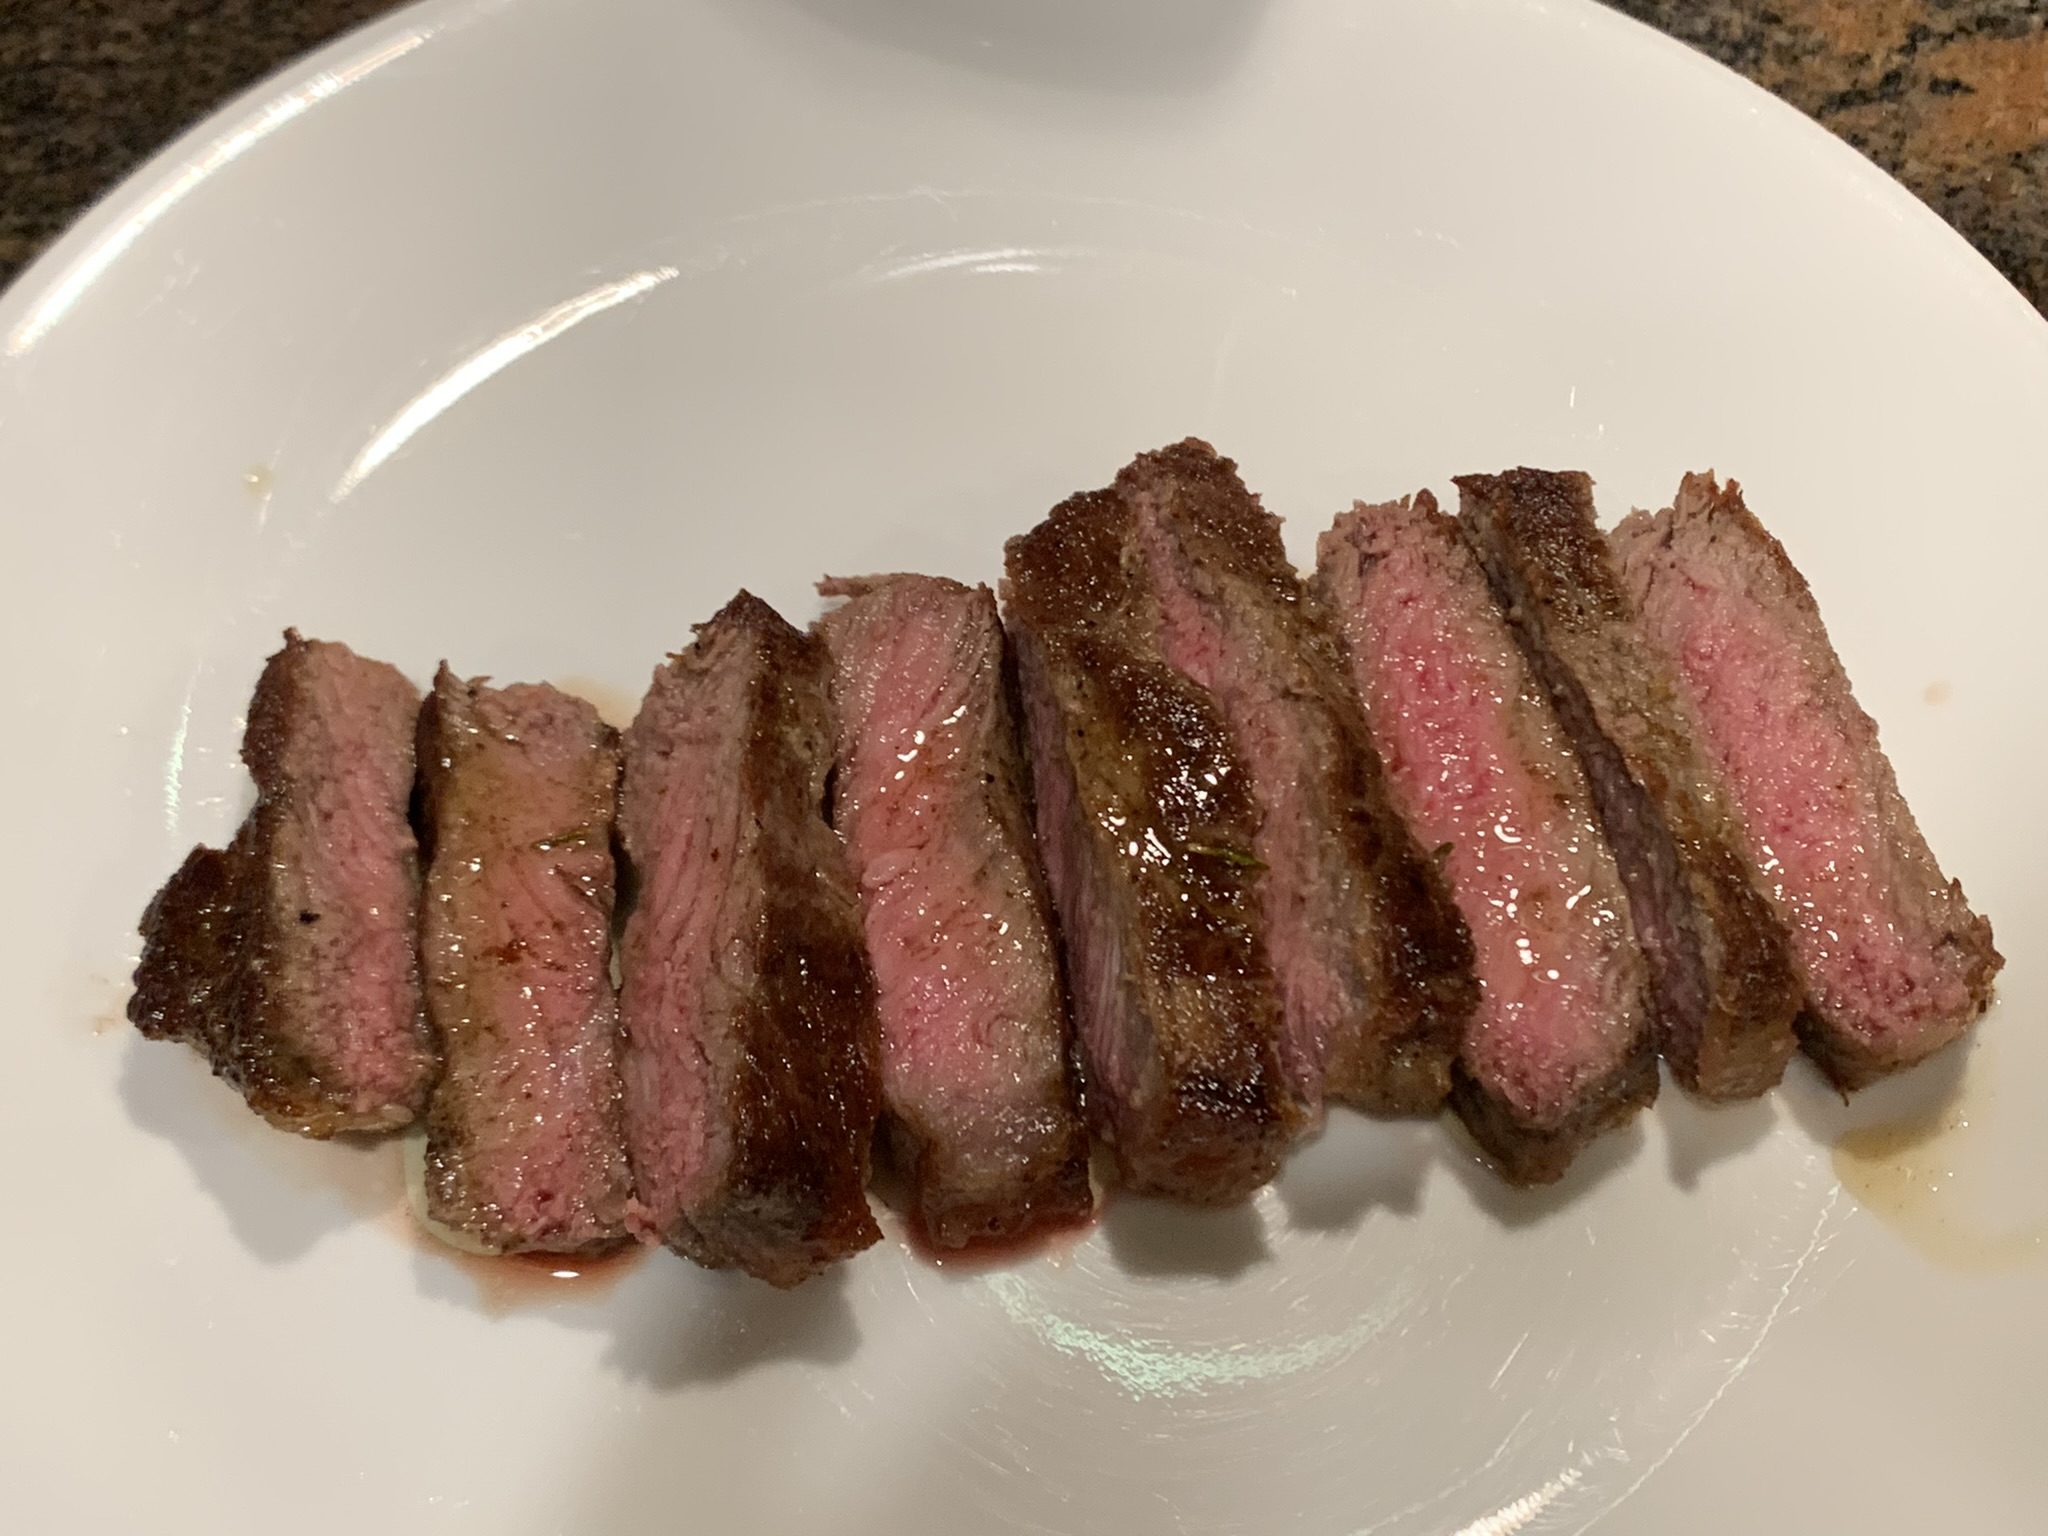

Steak was the first “big” dish I ever tried to make. Sure, I had experimented with making pasta and baked goods in the past, but steak was my first venture into the world of making foods that I had only previously seen in restaurants. I watched Youtube video after Youtube video, but the actual experience taught me a few lessons which I’ll never forget nowadays when I cook a steak for the family dinner.
Below, I’ll provide a few tips I have for making your own steaks, along with giving an example “recipe.”
Tools Needed: Cast-iron/Stainless steel pan, high-smokepoint oil/ghee, tongs, salt, pepper, instant meat-thermometer
Tips:
@ the Grocery Store:
#1: Choose a good cut of meat:
Yes, it may be tempting to go for the cheaper cuts out of fear of “messing up” a quality piece of beef, but cuts like top round and skirt steak will give you a smaller leash in terms of cooking them properly (although skirt steak does become quite a bit easier to cook once marinated).
Instead, go for a Ribeye or New York Strip steak – these are more tender and have more marbling (fat within the meat fibers), so you’ll have more room for error when cooking
#2: You don’t need a steak rub
I’ve actually never tried using a steak rub, and for good reason. Salt and pepper are enough on their own to enhance the meaty flavors, and garlic powder, if you want, will add a slight depth of garlicky aroma and flavor if desired.
@ Home.
#1: DRY. BRINE.
Dry Brining your steak sounds fancy, but it really isn’t. Simply take your steak out of its packaging at least 3 hours, but as much as 2 days, before you cook, and season generously with your desired seasonings. This process allows the seasoning (mainly your salt), to deeply penetrate the meat, both tenderizing it slightly and ensuring most of your meat is enhanced by the seasoning, instead of just the top layer.
#2: Pat your steak dry
In my opinion, this is the most important step. At this point there will be some moisture at the surface of your steak, both drawn out by your seasoning and just naturally from the beef. This water will prevent the steak from getting a good crust, which is where a good amount of the texture contrast you get when you bite into a restaurant steak comes from, making your steak taste more like chewy beef.
Take some paper towels and simply dap each side of your steak until it is dry on both sides
Finally, Cooking!
#1: Using a cast iron or thick-bottomed stainless steel pan (to hold heat better), preheat your pan until it’s pretty hot. You can do this by eye, but wait until you can’t comfortably hold your hand over it without feeling overheated.
#2: Add in your fat. I tend to use thick chunks of fat from the edges of my steak, and cook these down until crispy and brown, at which point they will have exuded a good amount of rendered fat into the pan. If your steak doesn’t have a lot of excess fat, simply use a high smoke-point oil like avocado oil or use clarified butter/ghee. The high smoke-point oil will ensure your fire alarm doesn’t start screeching at you midway through cooking, which still happens to me ~40% of the time, but its part of the fun at the end of the day!
#3: Once shimmering, add in your steak with a pair of tongs, laying it down away from you to ensure no grease splatter. At this point, push down with a metal spatula/your tongs to ensure a good meat/pan connection, and wait for a minute. From this point onwards, alternate between flipping, pushing down, and waiting one minute until your crust has developed to a brown-deep brown color.
#4: Now that we’ve achieved our crust, we just need to ensure the inside of the steak isn’t raw. Stick in your meat thermometer into the middle of the steak, going halfway down to ensure an accurate read. If you’ve reached ~5 degrees under your desired temp (reference the chart below), you can take the steak off the heat and rest it on the side for 5-10 minutes. If you are still under your desired temp. continue flipping and waiting, adding butter if desired for extra flavor, until you are ~5 degrees under your desired temp

The Waiting Game
Once you remove your steak from the heat, wait 5-10 minutes. You can pour your butter/oil over it for extra flavor, but waiting ensures the moistures within your steak don’t spill out the second you cut into it, along with cooling the steak down a bit.
Now, eat up! If you want to serve to a crowd, you can Google how to slice steaks against the grain, which makes them slightly more tender by cutting the meat fibers short, which ensures a faster chew. Me personally though, I’ll just cut the steak as I eat, relishing my new “gourmet” dish!
My Lie…
I was going to put a recipe here, as most of my posts have, but steak really doesn’t need one! I’ll put the ingredients measured for one of the steaks I made recently as a compromise, but please believe me: following the steps above will results in a decent steak, and the more you cook, the better your charred beef chunks will get!
My favorite Ribeye:
0.75 lbs of USDA prime ribeye
1 tbsp ghee
4 pinches of salt
10 cranks of black pepper
One shaking of garlic powder on each side of the steak
3 tbsp butter
1 sprig of rosemary
Steps:
- 3 hours before cooking, season the steak on both sides with the salt, pepper, and garlic powder
- Pat steak dry and turn heat to medium-high on my cast-iron pan
- Once smoking, add ghee and wait 30 seconds
- Place steak into pan
- Press steak into pan, wait 1 minute, flip with tongs. Repeat 4-6x until crust is achieved
- Add in butter and alternate flipping steak every 30 seconds until temperature reads 130 degrees Farenheit (I like my steaks Medium)
- Let steak rest for 8 minutes and then enjoy
My resume of Steak Cooking:


Leave a Reply